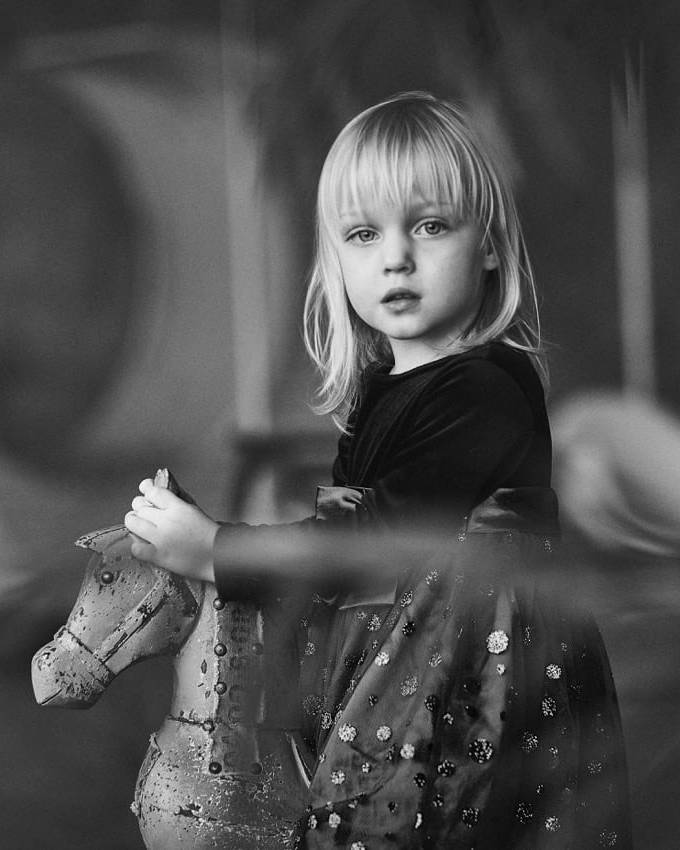
Self-tapes have become a regular part of the casting process for young actors and performers. Instead of travelling to a studio for a first-round audition, families are often asked to record a scene at home and submit it digitally.
The idea can feel daunting at first, but a successful self-tape does not require an expensive camera, professional studio or complicated editing. Casting teams mainly need to see and hear the performer clearly.
With a simple setup, careful preparation and a calm approach, parents can help their child create an effective self-tape without making the experience unnecessarily stressful.
Read the Instructions Before You Start
Every casting request is different, so begin by reading the complete brief.
Check for instructions covering:
- The scenes to record
- The submission deadline
- Camera orientation
- Framing
- Clothing or appearance
- Introductions or ident information
- Whether a full-length shot is required
- Accents or performance notes
- File names and formats
- How the recording should be submitted
- Confidentiality requirements
Do not assume that the setup used for a previous audition will be right for the next one.
If something important is unclear, ask your child’s talent agent before recording. It is better to clarify the instructions than submit a tape that cannot be considered.
Check Availability First
Before investing time in the self-tape, confirm that your child is available for the proposed filming, rehearsal, travel or performance dates.
Tell the agent immediately about any conflicts, school commitments or restrictions. The agent can then check whether the production still wants the performer to tape.
Casting deadlines can be short, but families should not confirm availability until they have checked their calendars properly.
Keep the Setup Simple
The self-tape should draw attention to the performer, not the room or equipment.
Choose a quiet space with:
- A plain or uncluttered background
- Enough room to frame the performer
- Good natural or artificial light
- Minimal background noise
- No visible personal information
- As few interruptions as possible
A neutral wall is usually sufficient. Grey, blue or another muted colour can work well, provided the performer does not blend into it.
Avoid filming in front of patterned wallpaper, open shelves, family photographs, mirrors or bright windows.
You do not need to recreate the location described in the script. Industry best-practice guidance encourages simple self-tapes rather than asking performers to turn their homes into sets.
Use a Phone or Camera You Already Have
A modern smartphone is usually capable of recording a good-quality self-tape.
Use the rear camera if practical, as it may provide better image quality, but the front camera can be useful if it helps with framing and does not reduce the recording quality significantly.
Before filming:
- Clean the camera lens
- Check that enough storage is available
- Charge the device
- Switch off notifications
- Select an appropriate video quality
- Place the device on a stable surface or tripod
- Record a short test
Avoid holding the phone by hand. Even small movements can distract from the performance.
Spotlight generally advises filming self-tapes in landscape orientation, with the phone positioned widthways. However, always follow the specific casting instructions if they request something different.
Position the Camera at Eye Level
The camera should normally be placed close to the performer’s eye level.
A camera positioned too low can create an unflattering angle, while one placed too high can make the performer appear to be looking down throughout the scene.
Keep the camera steady and avoid zooming or changing angles during the performance.
Unless the brief requests significant movement, a self-tape will often use a medium close-up showing the performer’s head and upper body. Some casting teams may ask for a tighter head-and-shoulders shot or a wider frame, so check the instructions.
Make sure the top of the performer’s head is not cut off and that their face remains visible when they move naturally.
Make Sure the Face Is Well Lit
Good lighting allows the casting team to see the performer’s eyes, expressions and reactions.
Natural daylight can work very well. Position the performer facing a window or slightly angled towards it.
Do not place the performer with a bright window directly behind them. This can turn their face into a dark silhouette.
If natural light is unavailable or inconsistent, use lamps positioned in front of the performer. The light should be soft and even rather than creating harsh shadows.
A ring light can be helpful, but it is not essential. Avoid placing it so close that it creates distracting reflections in glasses or makes the performer uncomfortable.
Check the lighting with a short test recording before beginning the full scene.
Prioritise Clear Sound
Casting teams must be able to hear every word.
Choose the quietest available room and listen for sounds you might normally ignore, including:
- Televisions
- Washing machines
- Fans
- Traffic
- Open windows
- Pets
- Other people talking
- Phone notifications
- Jewellery or clothing rubbing against a microphone
The phone’s built-in microphone is often sufficient when the performer is reasonably close to the device.
Record a short test and listen to it through headphones. Check that both the performer and reader can be heard, with the performer’s voice remaining the clearest.
An external microphone can improve sound, but it is not necessary for most home self-tapes.
Choose the Right Reader
The reader performs the other character’s lines from just beside the camera.
They should stand close enough to the lens to give the young performer a natural eyeline without causing them to turn too far into profile.
The reader should:
- Speak clearly
- Give the performer something genuine to respond to
- Avoid overpowering the scene
- Remain off camera unless instructed otherwise
- Keep their performance consistent between takes
- Allow the performer time to listen and react
A parent can usually act as the reader, but another suitable adult or older sibling may work better if the parent finds it difficult to read and manage the recording simultaneously.
The reader does not need to be a trained actor. Their job is to support the young performer and keep the focus on them.
Get the Eyeline Right
Unless instructed to speak directly to the camera, the performer should normally look towards the reader positioned just to one side of the lens.
This allows the casting team to see the performer’s face while maintaining a believable connection with the other character.
If the scene contains several characters, choose slightly different points near the camera for each one. Keep the eyelines close enough that the performer’s expressions remain visible.
Looking directly into the lens can feel overly intense unless the scene, advert or casting instructions specifically require it.
Help Your Child Understand the Scene
Before recording, read the script together and discuss what is happening.
Useful questions include:
- Who is the character speaking to?
- What has happened just before the scene?
- What does the character want?
- How do they feel at the beginning?
- Does anything change during the scene?
- What is the relationship between the characters?
Keep the discussion suitable for your child’s age. They do not need a complicated analysis; they need enough understanding to respond naturally.
If the script contains content that feels inappropriate, confusing or uncomfortable, pause and contact the agent before continuing.
Prepare Without Over-Rehearsing
Your child should be familiar enough with the material to concentrate on acting rather than searching for every word.
However, avoid directing every expression, pause and movement. An overly rehearsed performance can feel mechanical and make it harder for the child to adapt.
Encourage your child to:
- Understand the meaning of the scene
- Become comfortable with the lines
- Listen to the reader
- React naturally
- Speak clearly
- Try different choices
- Continue after small mistakes
Unless the instructions require complete memorisation, holding or referring discreetly to the script may sometimes be acceptable. Check with the agent if you are unsure.
Warm Up Before Recording
A short warm-up can help the performer feel more relaxed and focused.
Depending on the material, this might involve:
- Gentle stretches
- Shaking out physical tension
- Breathing slowly
- Saying a few tongue twisters
- Practising the opening line
- Reading the scene once with the reader
- Singing through scales when a song is required
Keep the warm-up brief and enjoyable. The aim is to prepare the voice, body and imagination—not tire the child before filming begins.
Choose Simple Clothing
Follow any wardrobe guidance included in the brief.
If no instructions are provided, choose simple, age-appropriate clothing in a colour that stands out from the background. Plain colours generally work better than busy patterns.
Avoid:
- Large logos
- Narrow stripes that distort on camera
- Noisy jewellery
- Hats or accessories that hide the face
- Elaborate costumes
- Heavy stage makeup
- Clothing that makes the child appear much older
A subtle suggestion of the character can be useful, but a full costume is rarely needed unless requested.
Hair should be styled naturally and kept away from the performer’s eyes. If they normally wear glasses, follow the agent’s guidance about whether to record with them.
Record the Requested Ident
Many casting teams ask for an introduction, often called an ident or slate.
The required information may include:
- The performer’s name
- Age or playing age
- Height
- Location
- Talent agency
- The role
- Relevant skills
- Availability
Only include the information requested. Do not encourage a child to provide personal contact details, a home address, school information or other unnecessary private information on camera.
The ident may need to be recorded separately, at the beginning or at the end. Follow the instructions exactly.
A full-length shot or profile view may also be requested. Keep these natural and straightforward.
Avoid Too Many Takes
Recording a self-tape repeatedly can make a child tired, frustrated and less spontaneous.
After a short rehearsal, record a small number of complete takes. Three is often enough to explore the scene without exhausting the performer.
If none of the takes work, pause. Have a drink, change activity or return to the scene later if the deadline allows.
Do not stop every time a word is slightly different from the script. Casting teams are usually more interested in the performance, connection and meaning than absolute verbal perfection, unless precise wording is particularly important to the project.
A natural take containing a tiny imperfection may be stronger than a technically perfect but tired performance.
Give Helpful Direction
Parents should support rather than control the performance.
Avoid comments such as “be sadder,” “smile more” or “do it properly.” Instead, return to the character and situation.
You might ask:
- What do you want the other person to do?
- What has just surprised you?
- Are you trying to hide how you feel?
- What changes when you hear that line?
- Could we try it as though this is the first time it has happened?
Give one clear note at a time. Too many instructions can make a young performer self-conscious and confused.
If the casting brief includes a specific direction, prioritise that over personal interpretation.
Keep Editing Minimal
A self-tape does not need music, titles, filters, transitions or visual effects.
Simple editing may be required to:
- Trim the beginning and end
- Join the ident and scene
- Combine requested scenes
- Add a simple title card if specifically requested
Do not edit different moments together to manufacture a single performance. Casting teams need to see how the performer sustains the scene.
Check that the final video plays from beginning to end and that the sound remains synchronised.
Name and Export the File Correctly
Follow the file-naming instructions included with the request.
If none are provided, a clear structure might include:
PerformerName_Project_Role_Scene
Avoid vague file names such as video1, final, or best-take-new.
Before submitting, confirm that:
- The file opens correctly
- The picture and sound are clear
- The orientation is correct
- The required scenes are included
- The correct take has been selected
- The file size meets the instructions
- The performer’s name is accurate
- No private information appears in the background
Do not reduce the quality so severely that the performer becomes difficult to see or hear.
Submit It Securely and on Time
Send the self-tape using the method specified by the agent or casting team. This may be through a professional casting platform, an upload link or another secure service.
For represented young performers, self-tape requests may be managed through their talent agent. Follow the agency’s process and do not contact the casting director independently unless specifically asked to do so.
Treat scripts, character details and production information as confidential. Do not post self-tapes, scripts or casting news on social media.
Submit as soon as reasonably possible rather than waiting until the final minute. This provides time to resolve upload problems and ensures the agent can check or forward the tape before the casting deadline.
Protect Your Child’s Privacy
An adult should be present or nearby while someone under 18 records a self-tape or attends a live online audition.
Parents should check:
- Who requested the audition
- How the file will be submitted
- What information the child is being asked to share
- Whether the content is age-appropriate
- Whether the request has come through the talent agency
- What will be visible in the background
- Whether clothing or physical-action requests are appropriate
Never include school names, addresses, family photographs, location details or other identifying information unnecessarily.
If any request feels unsafe, inappropriate or unusually intrusive, stop and contact the talent agent before recording or submitting anything.
Make the Process Accessible
Every child has different needs. Some performers may benefit from:
- Extra preparation time
- Instructions broken into smaller steps
- A visual schedule
- Regular breaks
- A quieter recording environment
- Flexible positioning
- Adjustments to communication
- Permission to refer to the script
- Alternative submission arrangements
Tell the agent about reasonable adjustments that would help your child show their abilities fairly. Access needs should not be treated as a lack of professionalism.
Common Self-Tape Mistakes
Some of the most common problems are easy to avoid:
- Ignoring the casting instructions
- Recording in portrait when landscape was requested
- Filming against a bright window
- Using a distracting background
- Allowing the reader to dominate the scene
- Positioning the reader too far from the camera
- Recording from an unflattering low angle
- Using costumes, props or effects that were not requested
- Directing the child so heavily that the performance feels forced
- Recording too many takes
- Submitting the wrong file
- Missing the deadline
- Sharing confidential material online
A simple tape that follows the brief will usually be more effective than an elaborate one that does not.
What Parents Should Remember
Your role is to create the conditions in which your child can do their best work.
That means organising the setup, reading the instructions, providing a calm reader, checking the finished file and submitting it safely. It does not mean producing a flawless performance at any cost.
Praise your child for preparing and completing the audition, regardless of the outcome. Once the tape has been submitted, allow them to move on rather than repeatedly analysing what they could have done differently.
Not receiving a recall does not mean the tape was unsuccessful. Casting decisions depend on many factors beyond the performer’s control.
A Great Self-Tape Lets the Performer Shine
The best self-tapes are usually straightforward: a prepared performer, a supportive reader, clear sound, good lighting and a natural performance that follows the brief.
You do not need a professional studio. You need a setup that helps the casting team focus on your child’s acting, personality and potential.
At The Talent House, we provide our young performers and their families with clear self-tape instructions and practical support throughout the audition process.
For additional industry guidance, visit Spotlight’s guide to setting up and filming self-tapes for young performers and Equity’s self-tape and online audition guidance.